
Children’s artwork is full of personality, memories, and milestones. A drawing can show a new skill, a favorite character, or a funny idea that deserves to be remembered. The challenge is finding a way to enjoy those creations without letting paper pile up on every surface in the house.
With a few simple habits, you can create an art organization system that is easy to maintain. The goal is not to save every piece of paper. Instead, create a thoughtful way to display special work, preserve meaningful projects, and give children a role in deciding what happens to their art.
Start With a Simple Sorting System
The easiest way to manage artwork is to sort it regularly. Set up a small area where new drawings, paintings, and school projects can be placed when they come home.
Use three basic categories:
– Display: Artwork that deserves a place on the wall, refrigerator, or a special shelf
– Save: Important or especially meaningful pieces to keep long term
– Recycle or reuse: Artwork that can be recycled, used for crafts, or removed from the collection
You can use folders, baskets, or labeled boxes for each category. Keep them in an easy-to-reach location so that sorting does not become a major project.
Try to sort artwork once a week or every few weeks. Regular sorting prevents large piles from building up and makes it easier to remember when and where each piece was created.
Create a Rotating Display Area
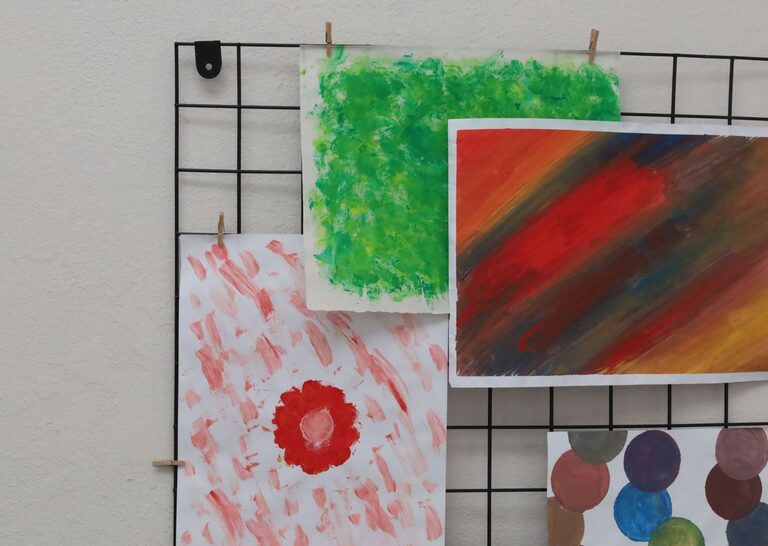
Children enjoy seeing their work displayed, but you do not need to cover every wall. Choose one area for rotating artwork. This might be a hallway, a section of the refrigerator, a bulletin board, or a wire with clips.
A rotating display can include:
– A few favorite drawings
– Recent school projects
– Seasonal artwork
– Three-dimensional crafts
– Pieces your child is especially proud of
Change the display when it becomes full or when your child creates something new. Let your child help choose which pieces go up and which pieces come down. This gives them a sense of ownership and teaches them that a display area has limited space.
Consider taking a photo of each display before changing it. This creates a visual record without requiring you to keep every item.
Use a Dedicated Art Folder for Each Child
A large folder can hold artwork that you want to keep but do not need to display. Choose a folder with pockets, an expanding file, or a sturdy portfolio case. Give each child their own folder and label it with their name.
You can organize the folder by:
– School year
– Age or grade
– Type of artwork
– Special events and holidays
– Personal favorites
Avoid making the folder too complicated. A system that takes only a few minutes to use is more likely to last. If you want to add more detail, write the date, child’s age, and a short note on the back of important pieces.
For larger projects, use a flat storage box or an art portfolio. Make sure the container is large enough to prevent artwork from being bent or damaged.
Take Photos of Oversized or Three-Dimensional Projects
Some artwork is difficult to store because it is large, fragile, or three-dimensional. A paper sculpture, cardboard model, or classroom project may not fit in a folder, but that does not mean you have to keep it forever.
Take clear photos from several angles. For artwork that includes your child, consider taking a picture of your child holding or standing beside the project. These photos can be more meaningful than the project itself because they capture both the creation and the moment.
Create a digital album for each child or each school year. Add simple details such as the date, project title, and a short comment from your child. This makes the collection easier to browse later.
Make a Yearly Art Book
A yearly photo book is a practical way to preserve a large collection. Gather photos of saved artwork, displays, and special projects, then arrange them by month or season.
You can include:
– A favorite drawing from each month
– Photos of art made at school or home
– Short quotes from your child
– Pictures of your child creating art
– Notes about new skills or interests
The book does not need to be perfect. A simple digital album or printed collection can become a meaningful record of your child’s growth. If you prefer a hands-on approach, use a scrapbook or binder with clear page protectors.
Set Limits Before the Collection Grows
Storage limits make decisions easier. Choose one box, folder, or drawer for long-term artwork. When it becomes full, review the contents together and decide what should stay.
Explain the limit in a positive way. You might say, “We have room for the pieces that are most special. Which ones should we keep?” This approach focuses on choosing favorites rather than throwing things away.
You can also set a display limit, such as five pieces per child. When a new item is selected, an older item can be moved to the keep folder, photographed, or recycled.
Involve Children in the Process
Children can learn useful organization skills by helping manage their artwork. Invite them to sort, choose favorites, and decide how their creations should be displayed.
Ask questions such as:
– What do you like about this piece?
– Do you want to display it or save it?
– Is this artwork finished, or would you like to add something?
– Which project shows something new you learned?
– Should we take a picture before we recycle it?
Younger children may need simple choices, while older children can take more responsibility for their own folders and digital collections.
Find Creative Ways to Reuse Artwork
Not every piece needs to be stored. Some artwork can have a second life as part of another project.
Try using artwork to make:
– Greeting cards
– Gift tags
– Book covers
– Collages
– Homemade wrapping paper
– Room decorations
– Laminated placemats
– Memory box labels
Cutting up artwork may feel difficult at first, especially if a child is attached to it. Ask for permission before reusing a piece, and avoid altering artwork that has strong sentimental value.
Keep Special Pieces Safe
For artwork you plan to keep for many years, use a dry, clean storage space. Avoid damp areas, direct sunlight, and places with frequent temperature changes. Store paper flat when possible, and use acid-free sleeves or folders for especially important pieces.
Do not overcrowd storage containers. Pressing artwork tightly together can cause bends, smudges, or tears. For delicate projects, wrap them loosely in clean tissue paper before placing them in a box.
Build a Routine That Works for Your Family
There is no single correct way to organize children’s artwork. Some families prefer a detailed filing system, while others use one folder and a digital album. The best method is one you can maintain without stress.
Start with three steps:
- Choose a display area.
- Set up one keep folder or box for each child.
- Schedule a regular time to sort new artwork.
Once the routine is familiar, add other ideas such as yearly art books, photo albums, or creative reuse. By making space for both organization and appreciation, you can preserve the memories that matter while keeping your home manageable.